Quick-Start — Walkthrough#
This tutorial creates a simple data environment for ATLAS to connect to.
At the end, you'll have a sample data loader using functionality from McLaren's implementation toolkit.
In this tutorial, you:
- Setup RTA Server from the implementation toolkit
- Generate and publish sample test data, configuration and sessions using the gRPC Services
- Test the deployment with ATLAS
Tip
These code samples are in C# for .NET 5.0, and use McLaren NuGet packages to keep things as simple as possible.
We recommend you follow this tutorial even if you are planning to do your integration in another language.
The concepts should translate very easily once you have a working example.
Prerequisites#
Check out the common tutorial prerequisites before you start.
You're going to need:
and optionally:
Step 1: Deploy RTA Server#
RTA Server is designed to support early development activity.
It provides session management, stores configuration, and can also store and serve data.
Install Docker Desktop for Windows.
Create convenient directories to store data and configuration.
For example:
mkdir C:\rta\configs
mkdir C:\rta\data
Use these paths in the command below for volume mounts (-v).
This example assumes you are running PostgreSQL on your host machine, accessed through host.docker.internal in the connection string below.
Update the command below with the hostname (if not host.docker.internal) and user/password.
By default, RTA Server will initialize the database using these credentials.
In PowerShell:
docker run --rm `
    -v "C:\rta\configs:/data/rta-configs" `
    -v "C:\rta\data:/data/rta-data" `
    -e "RTA_PostgresConnectionString=Server=host.docker.internal;Port=5432;Database=postgres;User Id=postgres;Password=hunter2;" `
    -e "RTA_Store=File" `
    -p 8080:8080 -p 8082:8082 `
    mclarenapplied/rta-server
If Docker is not available in your development environment, you can download and run the service as an executable.
Create convenient directories to store data and configuration.
For example:
mkdir C:\rta\configs
mkdir C:\rta\data
Use these paths in the command below.
In PowerShell:
rta-server.exe `
    --PostgresConnectionString "Server=localhost;Port=5432;Database=postgres;User Id=postgres;Password=hunter2;" `
    --Store File
    --FileConfigsPath C:\rta\configs
    --FileDataPath C:\rta\data
Create convenient directories to store data and configuration.
For example:
mkdir -p /tmp/rta/configs
mkdir -p /tmp/rta/data
Use these paths in the command below for volume mounts (-v).
Update the command below with the hostname (if not localhost) and user/password.
By default, RTA Server will initialize the database using these credentials.
In a terminal:
docker run --rm \
    -v "/tmp/rta/configs:/data/rta-configs" \
    -v "/tmp/rta/data:/data/rta-data" \
    -e "RTA_PostgresConnectionString=Server=localhost;Port=5432;Database=postgres;User Id=postgres;Password=hunter2;" \
    -e "RTA_Store=File" \
    -p 8080:8080 -p 8082:8082 \
    mclarenapplied/rta-server
Docker Notes
The -v option mounts a directory on the host (left-hand-side) into a path in the container (right-hand-side).
The host path needs to be an absolute path.
If you have something else running on port 8080 or 8082, you can use Docker to change the port.
Step 2: Check the Service#
HTTP (port 8080)#
In a web browser, go to http://localhost:8080
You should see some text similar to this:
MAT.OCS.RTA.Toolkit.Hosts.Server 2.0.0.0
Provides RTA Toolkit services as a single deployment
    Grpc: enabled
    Data write: enabled
    Data admin: enabled

Metrics: /metrics
Health: /health
Troubleshooting
- Is something else running on port 8080?
Also browse to http://localhost:8080/health
This should report: Healthy.
If the service says it is Unhealthy, the console log output should say why.
Troubleshooting
Possible reasons why RTA Server would report Unhealthy:
- Can't communicate with PostgreSQL, or wrong PostgreSQL credentials
- Can't find the specified directories for configs and data
gRPC (port 8082)#
Grab a copy of grpcui.
From a terminal:
grpcui -plaintext localhost:8082
If successful, this will open a web page where you can browse and interact with the gRPC services — which will be useful later.
Troubleshooting
- Make sure you ran
grpcuifrom a command prompt / terminal - Is something else running on port 8082?
Step 3: Build the Demo project#
Get the sample source code#
Clone the sample project from RTA.Examples on GitHub.
You will need a free GitHub account.
Setup the NuGet Package feed#
The McLaren GitHub site has instructions for setting up the feed in Visual Studio.
Use your GitHub account to create a PAT (access token) with the read:packages permission, and modify the NuGet.Config file in the sample project to match.
The resulting NuGet.Config file should look something like this:
<?xml version="1.0" encoding="utf-8"?>
<configuration>
    <packageSources>
        <add key="mclaren" value="https://nuget.pkg.github.com/mat-docs/index.json" />
        <add key="nuget.org" value="https://api.nuget.org/v3/index.json" protocolVersion="3" />
    </packageSources>
    <packageSourceCredentials>
        <mclaren>
            <add key="Username" value="USERNAME" />
            <add key="ClearTextPassword" value="TOKEN" />
        </mclaren>
    </packageSourceCredentials>
</configuration>
From the terminal (or using Visual Studio), in the source code directory:
dotnet restore
Build the projects#
From the terminal (or using Visual Studio), build the solution:
dotnet build
Troubleshooting
- Make sure you are in the correct directory
- Make sure you have .NET 5.0:
dotnet --versionshould return something like5.0.xxx
Step 4: Run the Demo#
Open the solution in your development environment (e.g. Visual Studio Code).
There are several projects. You will be running RTA.Examples.Loader.
From the terminal, navigate to this sub-directory, and then:
dotnet run
If the service has been setup correctly, this will create an example session.
You can create more sessions by running it again.
Troubleshooting
- Make sure RTA Server is running
- Make sure you're running the
RTA.Examples.Loaderproject - If you changed the gRPC port, update the demo source code
Step 5: Setup ATLAS#
Setup the connection#
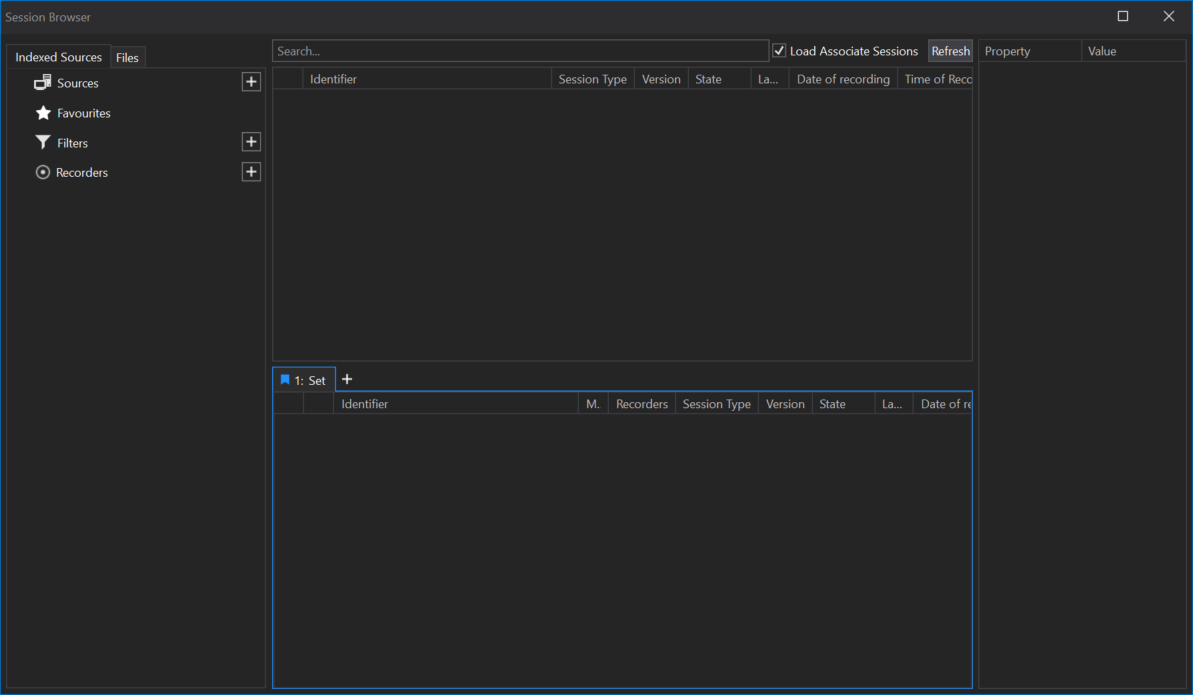
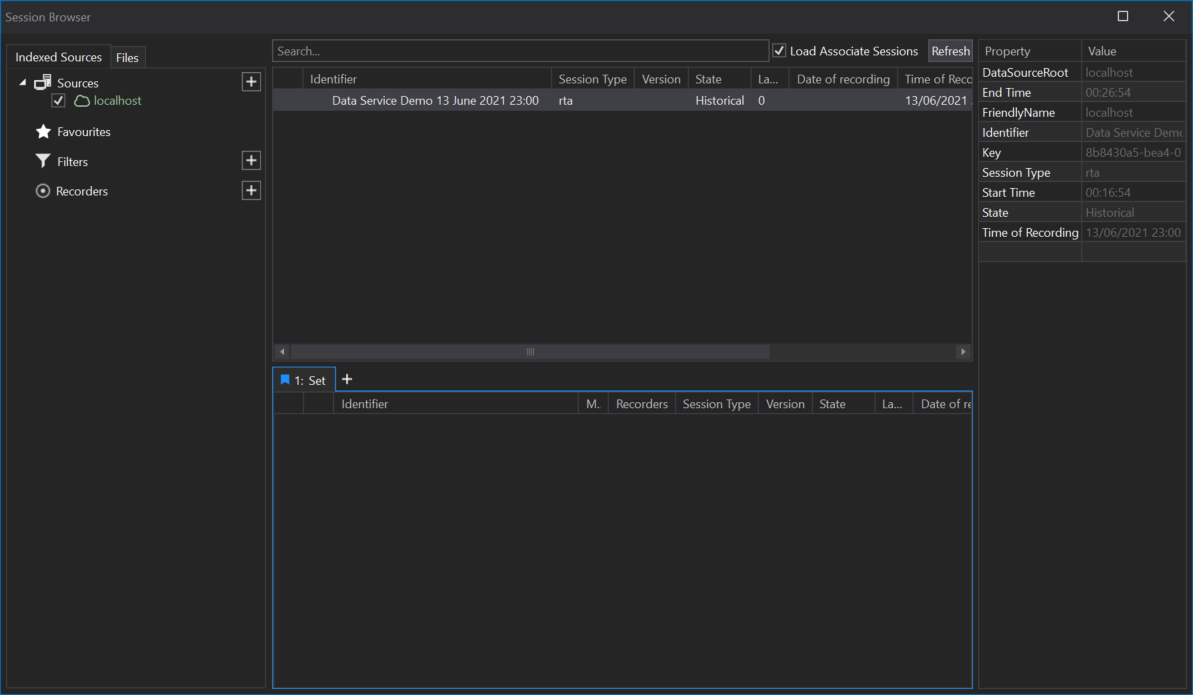
Open the ATLAS Session Browser.
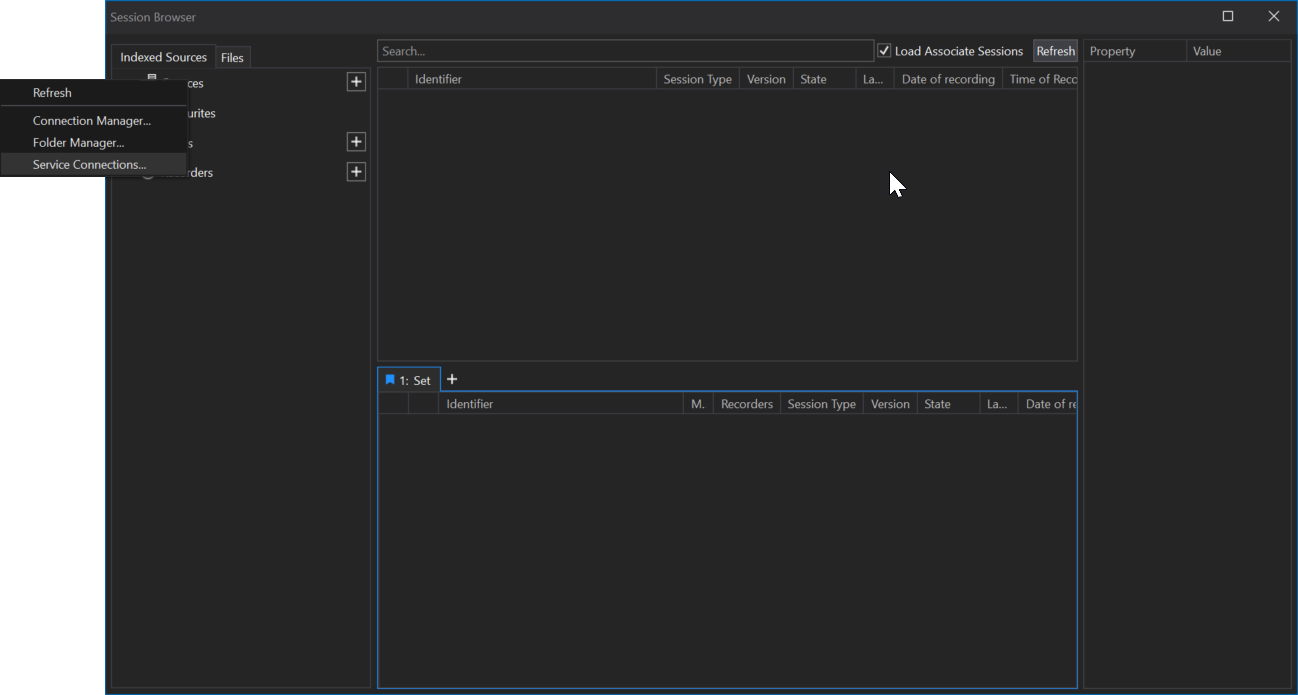
Right-click on Sources and select Service Connections...
Info
If you don't see this option, your ATLAS licence does not have the RTA Data Service Connections feature.
Please Contact your sales rep or McLaren Field Application Engineer.
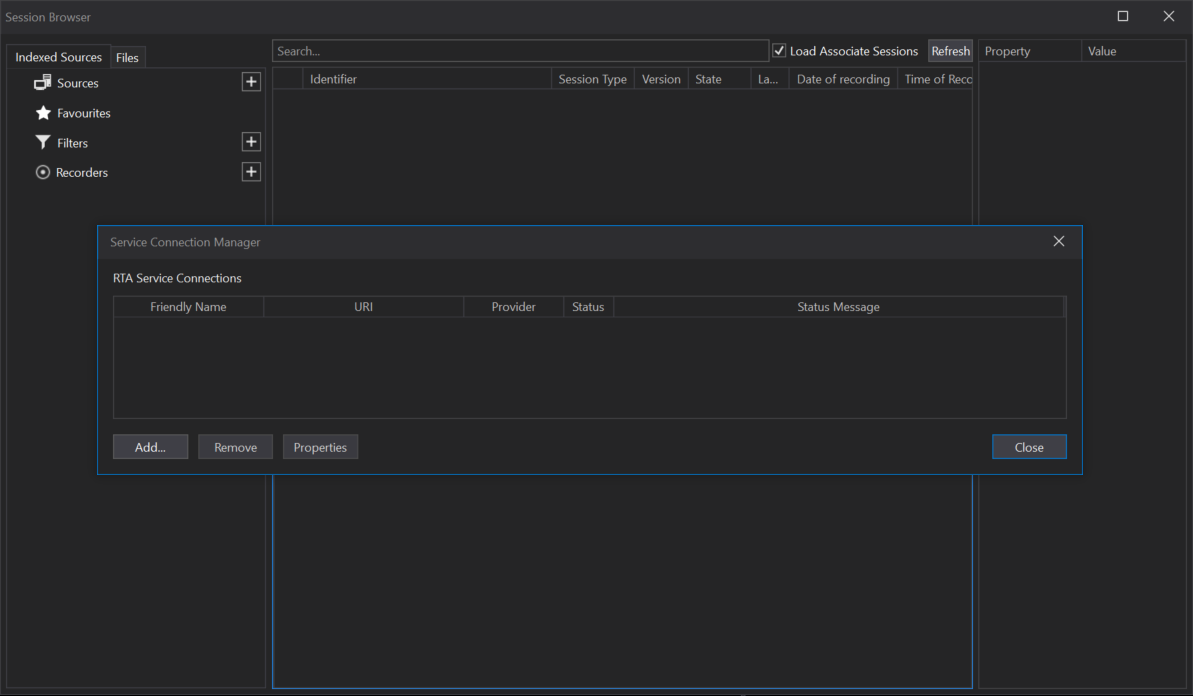
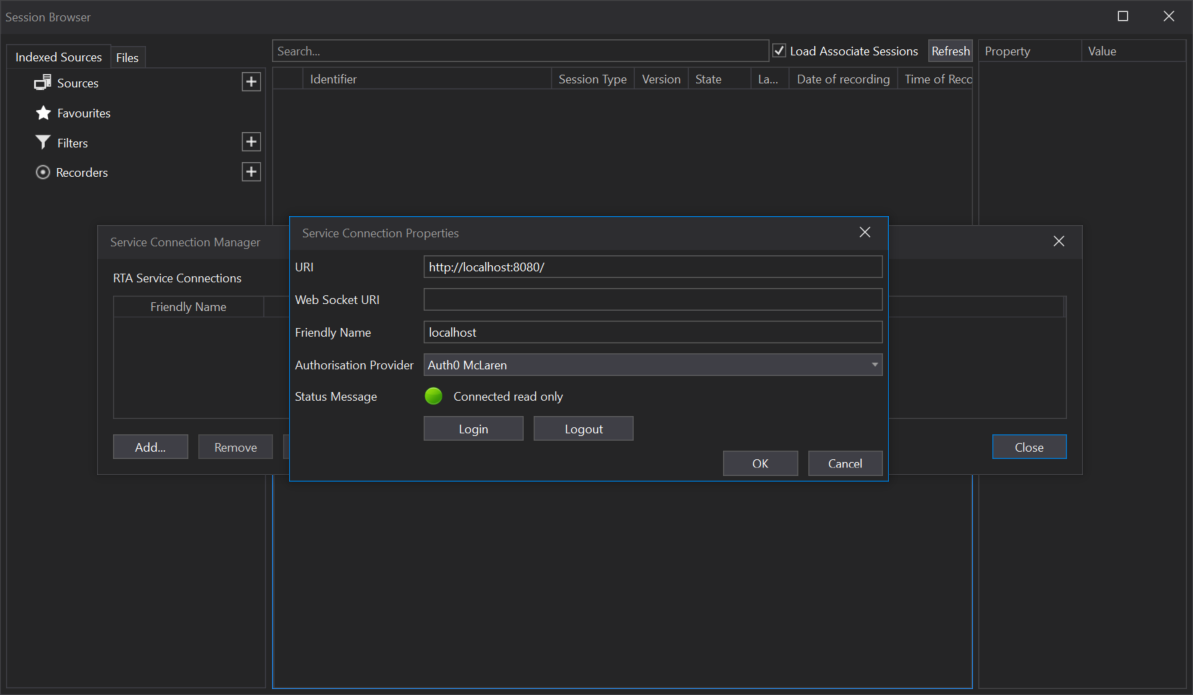
From the Service Connection Manager dialog, add a new connection like this:
- URI:
http://localhost:8080 - WebSocket URI: (blank)
- Friendly Name:
localhost
Close the dialogs, and right-click Sources and select Refresh.
The localhost source should appear.
Tick the localhost source and press the Refresh button on the right-hand-side of the dialog.
You should see one or more sessions.
Troubleshooting
- If the localhost source is Red, maybe you mistyped the URI or the service isn't running?
- Do you have the right version of ATLAS (see Prerequisites)?
Test the session#
Double-click to load a session.
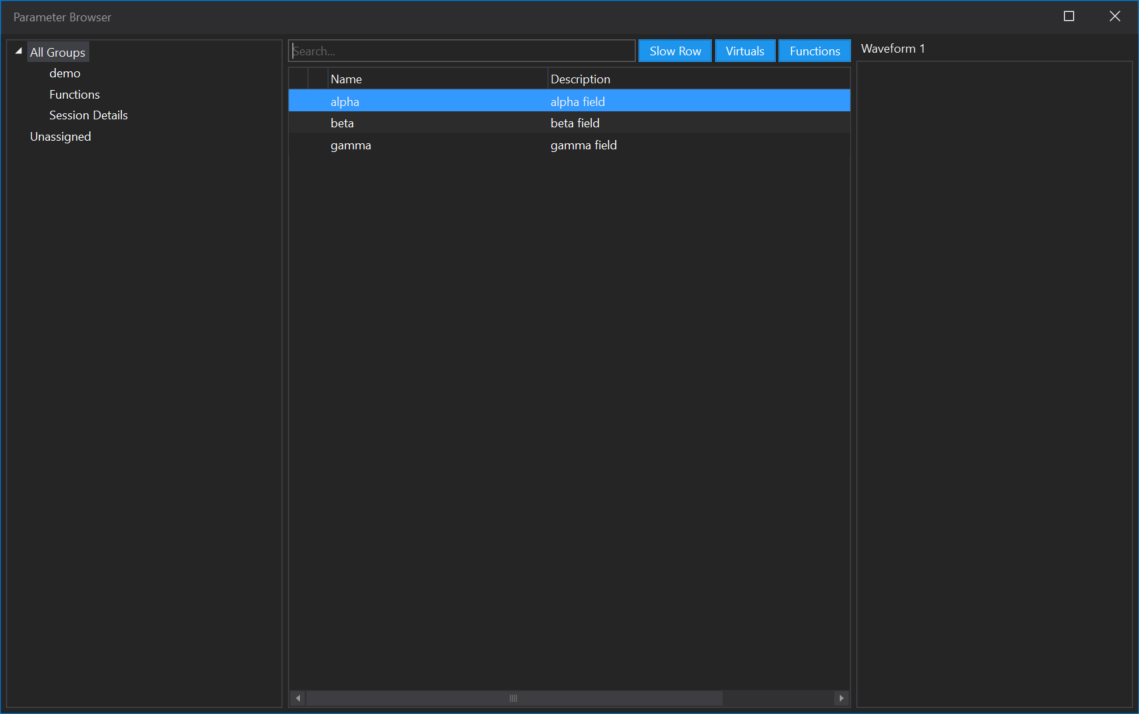
Add a Waveform display, and press P to add parameters using the Parameter Browser by double-clicking or dragging.
You should see waveform traces.


Next Steps#
Review the sample project to understand how each routine contributes to the demo integration.
You can use this project to experiment with RTA features in this documentation.